MENU
close
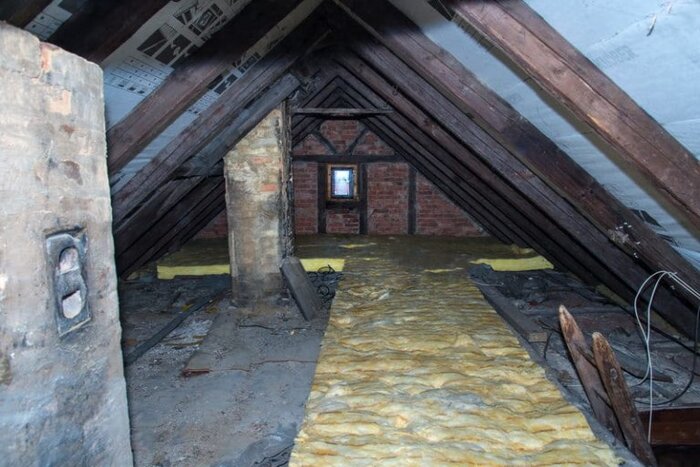
Removing and replacing outdated or damaged insulation is a critical part of optimizing whole-home energy efficiency, interior comfort, and indoor air quality. However, it’s important that you prepare the attic ahead of time or you risk compromising all-of-the-above.
Here are the steps required to ensure your attic insulation replacement does the job it was designed for.
Your attic needs to be thoroughly cleaned and prepared for the new insulation, and that requires a completely clean slate. Find a new location for all of the furniture, boxes, or other items stored in the attic. You can replace them after your new insulation is installed.
Attic insulation – even batt form – begins to break down over time, and most of the insulation manufactured prior to the year 2000 is laden with fiberglass and/or toxins. This makes it difficult – and dangerous - to remove without proper training, protection, and equipment.
We highly recommend working with professionals to remove your insulation to make sure the job is done right, and that the rest of your home is protected from potentially harmful particulate matters – not to mention a huge mess.
Make sure your attic removal company takes all of the necessary precautions, including:
Failure to take proper safety precautions puts you at risk for inhaling fiberglass or toxic remainders of mold/mildew, prior pest infestations, or smoke/carcinogens leftover from previous fire damage.
Now that the old insulation is gone, it’s the ideal window for having the roof and attic inspected by professionals. Is there a need for plumbing or electrical repairs? Is it time to have your HVAC replaced or to have the ducts cleaned or repaired? Is there adequate attic ventilation? When was the last time your attic ventilation was inspected?
There’s no time like when the attic is empty, and before your new insulation is installed, to get everything in tip-top shape. Now’s a good time to contact:
Kill two birds with one stone when you prepare your attic for insulation. Taking care of these items now maximizes the benefits of your new insulation and that nobody needs to work in the attic space again for quite some time.
If you’re replacing attic insulation, odds are your home is older, has experienced water or fire damage, or has had its fair share of pesky, pesty freeloaders over the years. Plus, dust and other debris are additional remnants of older attic space.
Clean the attic as thoroughly as possible to create a blank slate. We recommend a professional attic cleaning, which removes all traces of pests, water/smoke damage, mold and mildew, and microscopic particulates using professional vacuum and disposal equipment. Your attic will look and smell like new, and your new insulation won’t be compromised by existing dirt, debris, or pests.
Finally, the last step in preparing your attic for insulation is to seal any leaks. You can do this work yourself with a tube of caulking, or your attic professionals will do it for you. Energystar.gov’s resource, Attic Air Sealing, has detailed information as well as guidelines as to whether sealing your attic is a DIY job, or whether it’s worth hiring professionals.
At the very least, energy.gov recommends having the proper materials on hand, which include:
Any and all air leaks around windows, the roofline, and around penetrations made by vents, HVAC equipment, plumbing, and electrical work, etc., should be completely sealed off to mitigate heat gain and loss during peak seasons.
That being said, air sealing must be paired with adequate ventilation (see above) to ensure there healthy fresh airflow that prevents air toxicity or contamination in the building from accumulating at dangerous levels.
Once you’ve completed the above steps, your attic is ready for new insulation. Contact us here at Attic Solutions to schedule a free, on-site estimate. We’re licensed insulation contractor's with years of experience here in the Bay Area.