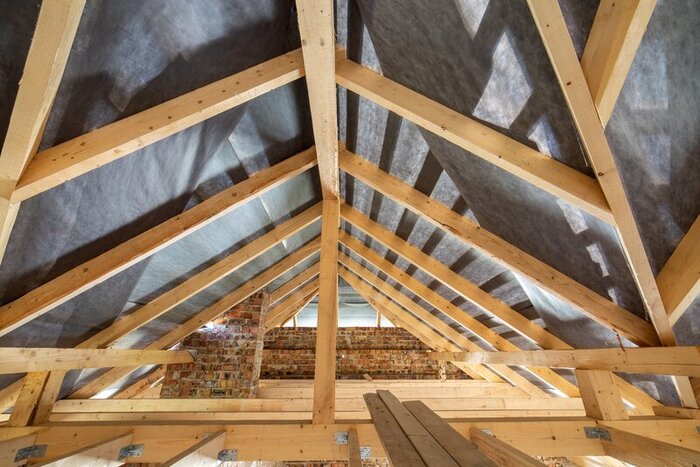
Any attic air leaks pose a threat to the whole home's comfort, energy efficiency, and air quality. Leaks are a major source of heat loss and heat gain in any home. And, if you live in the Bay Area, the combination of a leaky home or attic and inadequate venting and filtration affects indoor air quality too.
Using data compiled by roofing, attic, and insulation specialists, energy-efficiency experts state that the average home has the equivalent of a two-foot hole in its attic, acting like an uncontrolled year-round draft-friendly energy waster. However, this access to airflow doesn’t exist as a single hole. Instead, it is the complication of a series of small openings and leaks that all add up to a significant heat gain and loss source, depending on the season.
As we head into the winter months, consider scheduling an attic inspection to tackle any existing leaks before they take their toll on seasonal heating costs and utility bills.
During the winter months, unaddressed leaks allow heated air to escape from your home while sucking cold air inside through gaps around windows and exterior doors. During the summer months, the process is reversed; hot exterior air migrates inside while cool, conditioned air flows to the home's exterior.
In addition to fluctuating indoor temperatures and uncomfortable drafts, heat gain/loss through attic leaks also causes your HVAC system to work overtime, which leads to unnecessary repair and replacement costs. And it’s also important to remember that attic leaks are often the source of rodent infestations.
Sealing attic leaks can be a DIY job. However, in most cases, it’s best to work with Bay Area attic and insulation specialists who have everything it takes to identify, repair, and seal existing leaks in a single visit.
There are several common signs or indicators that you have a leaky attic.
Most of these are also signs your attic is underinsulated. A professional attic inspection determines whether either or both are true, after which we’ll discuss your options.
Air sealing around the home is a relatively straightforward DIY project. With weather stripping and a caulking gun, and a few extra repair items, the average handy homeowner or renter can quickly seal the most common leaks around exterior doors, windows, and penetrations (plumbing, electrical, cable/internet, etc.).
However, attic leaks are more challenging because attic spaces tend to be more difficult to access and move around in. Therefore, you must be very careful when moving around on attic joists/trusses, around exposed plumbing, HVAC ducts, or electrical wires. You must have the right safety equipment to protect your body and your lungs as insulation gets moved and shifted around.
Connecting with a local, licensed attic and insulation professional is the simplest way to seal attic leaks once and for all without any safety risks and without compromising the attic, insulation, roofing, or ventilation systems.
The first thing we do is to verify air leaks. We look for leaks, gaps, and holes around chimneys, light fixtures, ventilation penetrations, chimney(s), plumbing penetrations, wiring, rafters, and attic windows. We’ll also ensure the space around your home’s attic access is sealed to prevent heat/gain and loss between the attic and your living spaces.
If you choose the DIY route, practice extreme caution when working around electrical wires and penetrations. We recommend cutting power to the entire home and using battery-powered lights as you work, avoiding any risk of electrical shock or electrocution.
The industry used to recommend using a candle and moving it slowly along and around the roof line and the areas prone to leaks listed above. The wavering flame was an indicator of a leak. However, that poses a significant fire risk.
Instead, we recommend using an incense stick. There’s far less risk of starting a fire, and the stream of smoke will waver when exposed to even the slightest air movement. Mark areas where you notice air movement with chalk or something easy to see so you can return to them once your attic air leak inspection is finished.
The equipment and tools you use depend on the location and size of the leak you’re sealing. Having the following tools on hand ensures you’re ready for any attic air leaks.
Never use any tool or repair product unless you feel 100% comfortable. Failure to seal leaks correctly is a huge waste of your time and energy and could result in injury if you’re not careful.
We recommend starting with the most significant air leaks first. This way, you stop the largest sources of energy loss in their tracks, providing instant satisfaction. Also, if the DIY version of sealing attic air leaks becomes more than you originally bargained for, you’ll reap the benefits of immediate comfort improvements while you wait for your attic contractor to schedule the rest of the air sealing.
Large leaks are sealed by filling holes or gaps with batt or fiberglass insulation and then covering and sealing that with your garbage/durable plastic bags, creating a vapor barrier.
Use caulk to seal leaks that are 1/4 inch or less. The spray foam seals gaps or holes larger than 1/4 inch but too small to sensibly plug and fill with insulation.
Would you rather hire industry professionals to seal your home or business’s attic air leaks? We don’t blame you. Contact Attic Solutions to schedule an important. You’ll notice an immediate difference, and professional leak sealing yields reduced energy spending for years to come.